
As a Branditechture customer, your business email should work with any email client (A.K.A Email app) of your choice but Branditechture provides support for the following email clients;
- Gmail app (recommended)
- Samsung Mail
- Apple Mail
- Mail.com app
- Windows 10 Mail
- Microsoft Outlook
To set up your business email in your preferred email client, you will need some or all of the following details;
- Email address
- Email account password
- Incoming server address
- IMAP Port or POP3 Port
- Outgoing server address:
Every Webmail account is unique, so you need to request your own details from us. We typically respond with your details in 10 minutes.
Let’s do a quick demo set-up using the Gmail app on an Android smartphone.
⚠️ Please note: The credentials used in the guide below 👇🏽 WILL NOT work for you. Please request yours if you don’t already have one. We would typically send your details within 10 minutes.
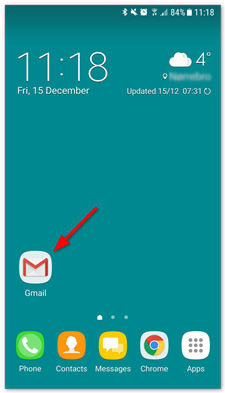
Step 1 – Open the Gmail app
Open the Gmail app on your Android device.
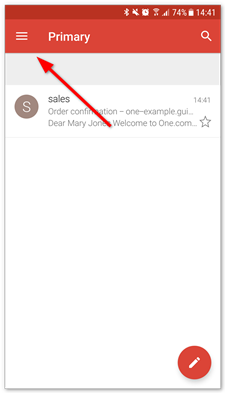
Step 2 – Go to Settings
- Tap the menu in the top left corner.
- Tap Settings at the bottom of the menu that opens.
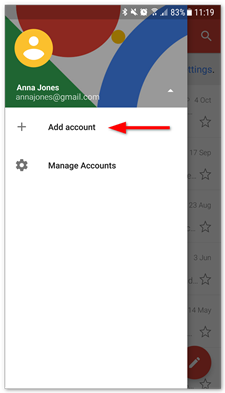
Step 3 – Tap Add account
Select Add account to start setup.
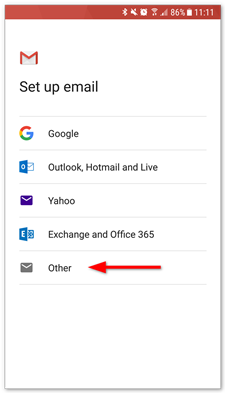
Step 4 – Tap Other
Select Other as the account you want to set up.
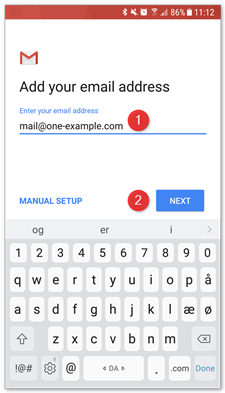
Step 5 – Enter your email address
- Type in the business email address you want to set up.
- Click Next.
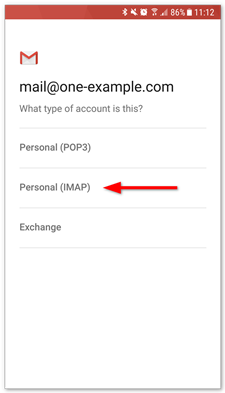
Step 6 – Select IMAP
Select IMAP as the account type.
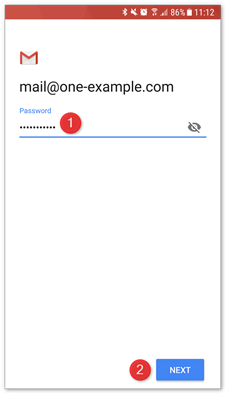
Step 7 – Enter your password
- Type in your email password, the one you use to log in to Webmail.
- Tap Next.
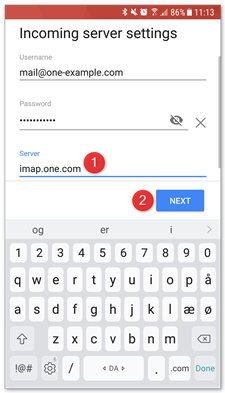
Step 8 – Enter your incoming server
- Type in your incoming server address as provided.
- Tap Next.
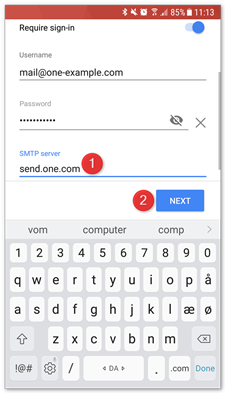
Step 9 – Enter your outgoing server
- Type in your (outgoing) SMTP server as provided.
- Tap Next.
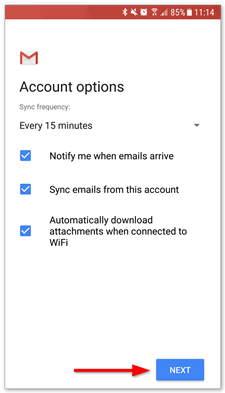
Step 10 – Select account options
Here you can set how often Gmail should look for new emails, receive notifications, and more. Uncheck any options you don’t want or leave as is, and tap Next to continue.
Step 11 – Done!
Your account is now set up and ready to go!
