
Google Analytics is a free online tool developed by Google to help you monitor visitor usage on your website. You can use this data to determine;
- What pages are the most popular and which ones are the least
- How long they typically spend on your website before exiting
- Bounce rate (“bounce” is when a user checked your website and left without checking out something else)
- How many pages views your website generates per day, per week, per month etc.
Click HERE to see the full list of user data you can collect using Google Analytics.
IMPORTANT: Before using Google Analytics, please ensure that your website is GDPR/CCPC/NDPR Compliant. Not to worry, if your website was designed by Branditechture, then chances are very good that your website is already compliant.
Now, let’s start.
Requirements;
- You must be able to login to your WordPress Admin Dashboard
- You must know how to install a plugin
- You must have a Google account (e.g Gmail Account)
I believe you should be able to meet all the three requirements above. Installing a plugin on your website is very simple. However, if you are totally new to this, please click HERE for a quick intro and come back here for the rest of this guide.
This guide consists of three easy parts namely;
- Installation of A Plugin Called Google Site Kit
- Site Kit & Search Console Setup
- Connecting Your Website To Google Analytics
Now, let’s start.
Part 1: Install Google Site Kit
STEP 1: Log in to your WordPress Admin Interface
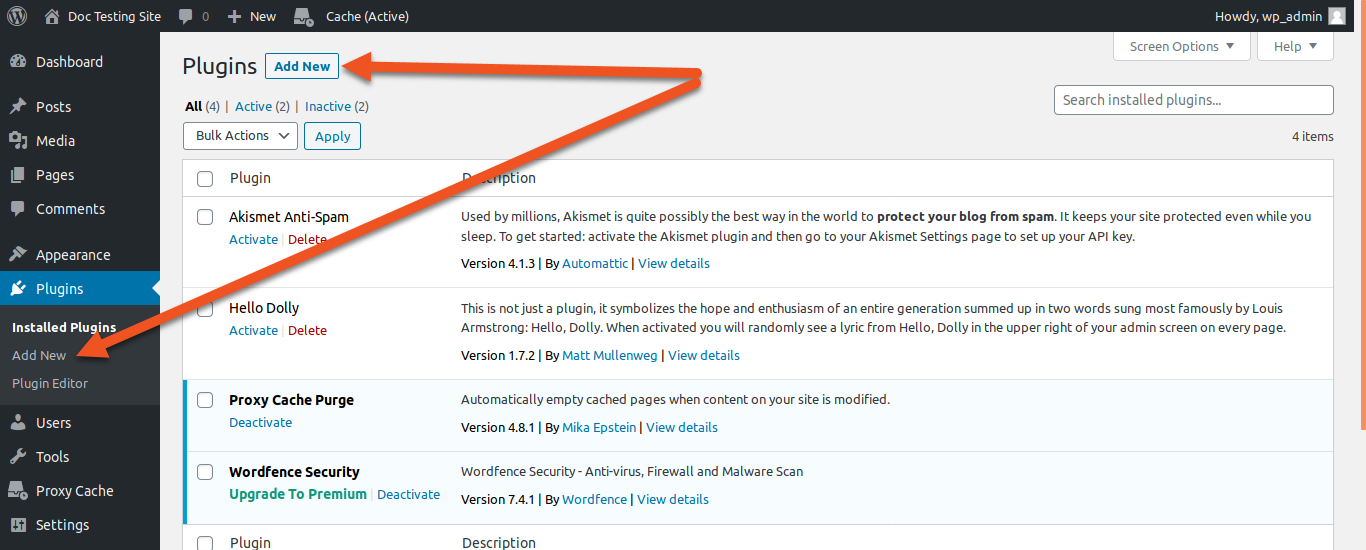
STEP 2: In the left sidebar, Click or Hover on Plugins (hover means to bring your mouse cursor over something on your screen)
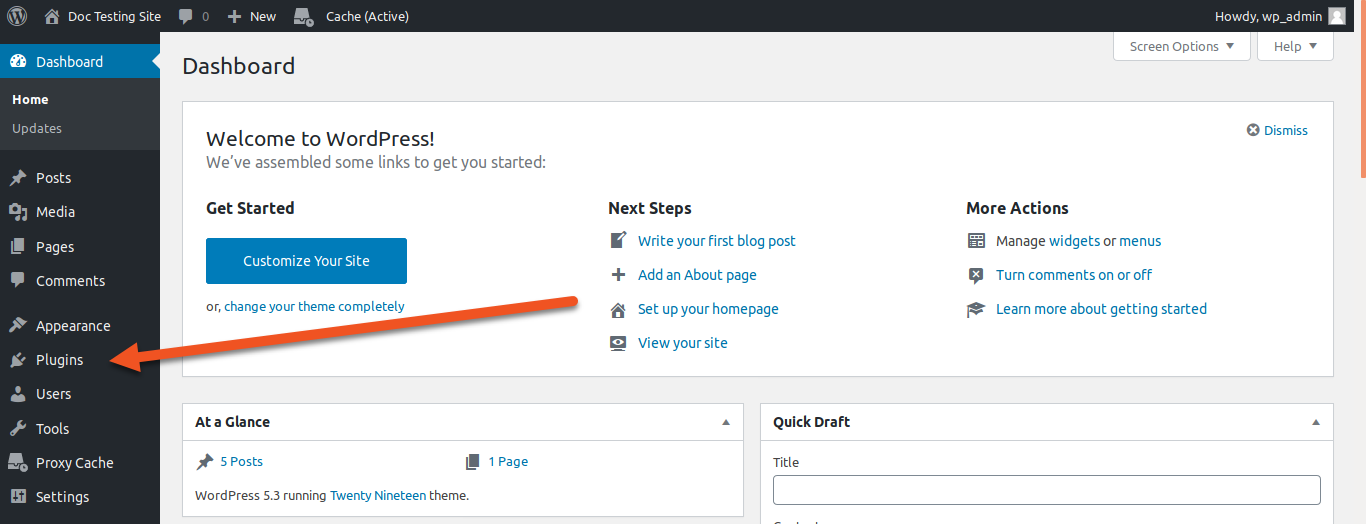
STEP 3: Click the Add New button from the flyout or submenu

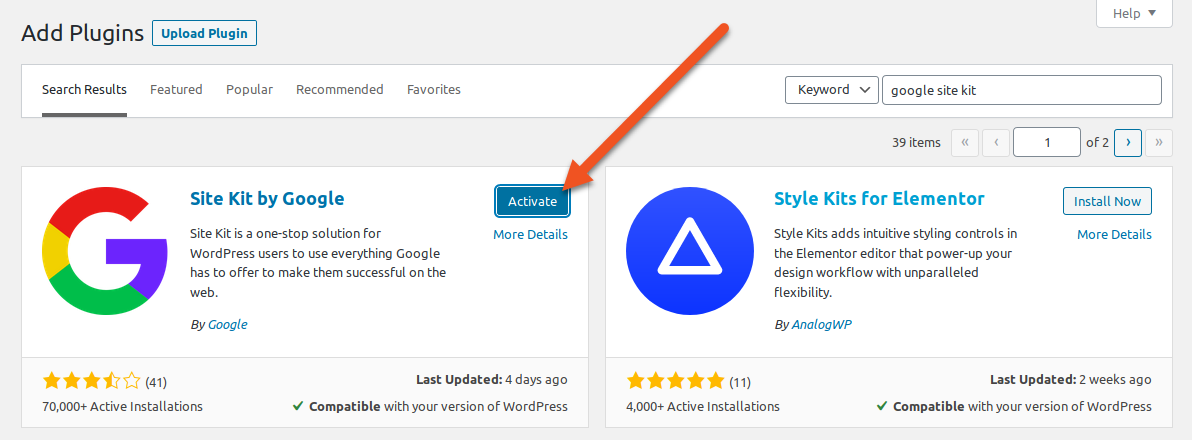
STEP 4: Search the plugin directory for Google Site Kit, Once you have found it, click the Install Now button
STEP 5: Once installation has finished, click Activate
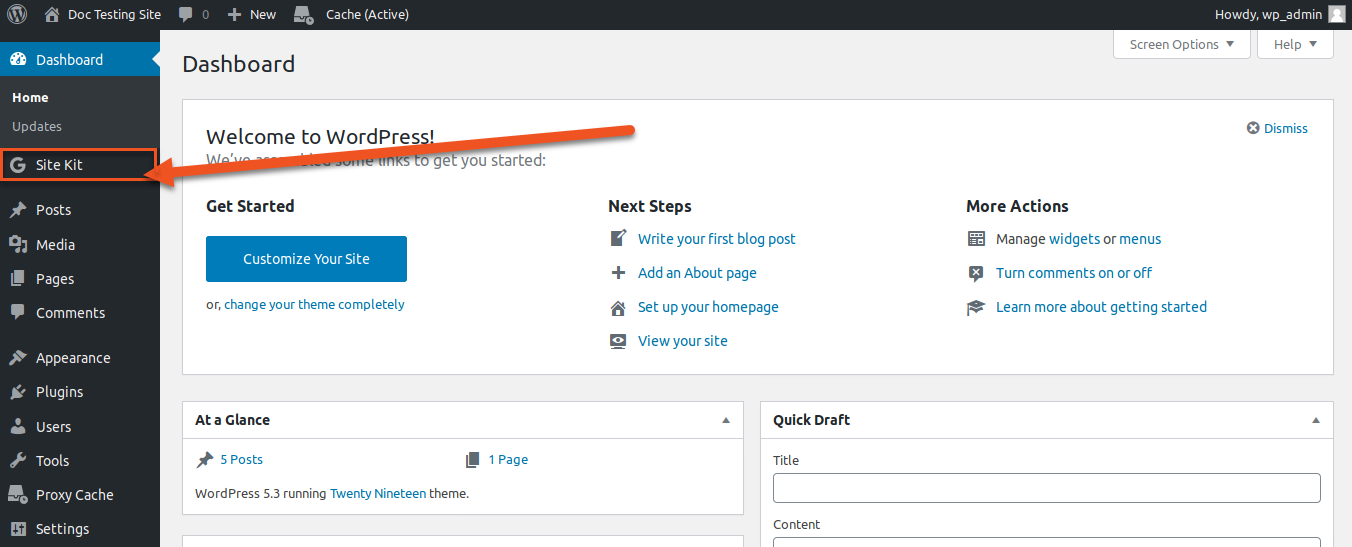
Upon clicking “Activate” You will now be redirected to the main plugin page. A wide banner will display across the top of the page with a Google Site Kit logo.
You will also notice a new menu named Site Kit on the left sidebar. You can access the Google Site Kit tool at any time by clicking on it.
Part 2: Set Up Site Kit & Search Console Setup
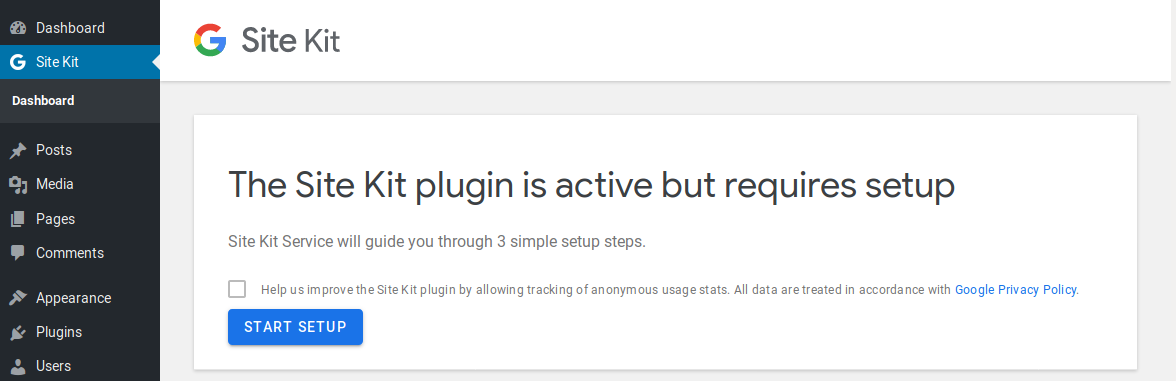
You’ll need to setup Site Kit, so click on the brand new Site Kit menu on the left sidebar. This will take you to the Google Site Kit Setup page.
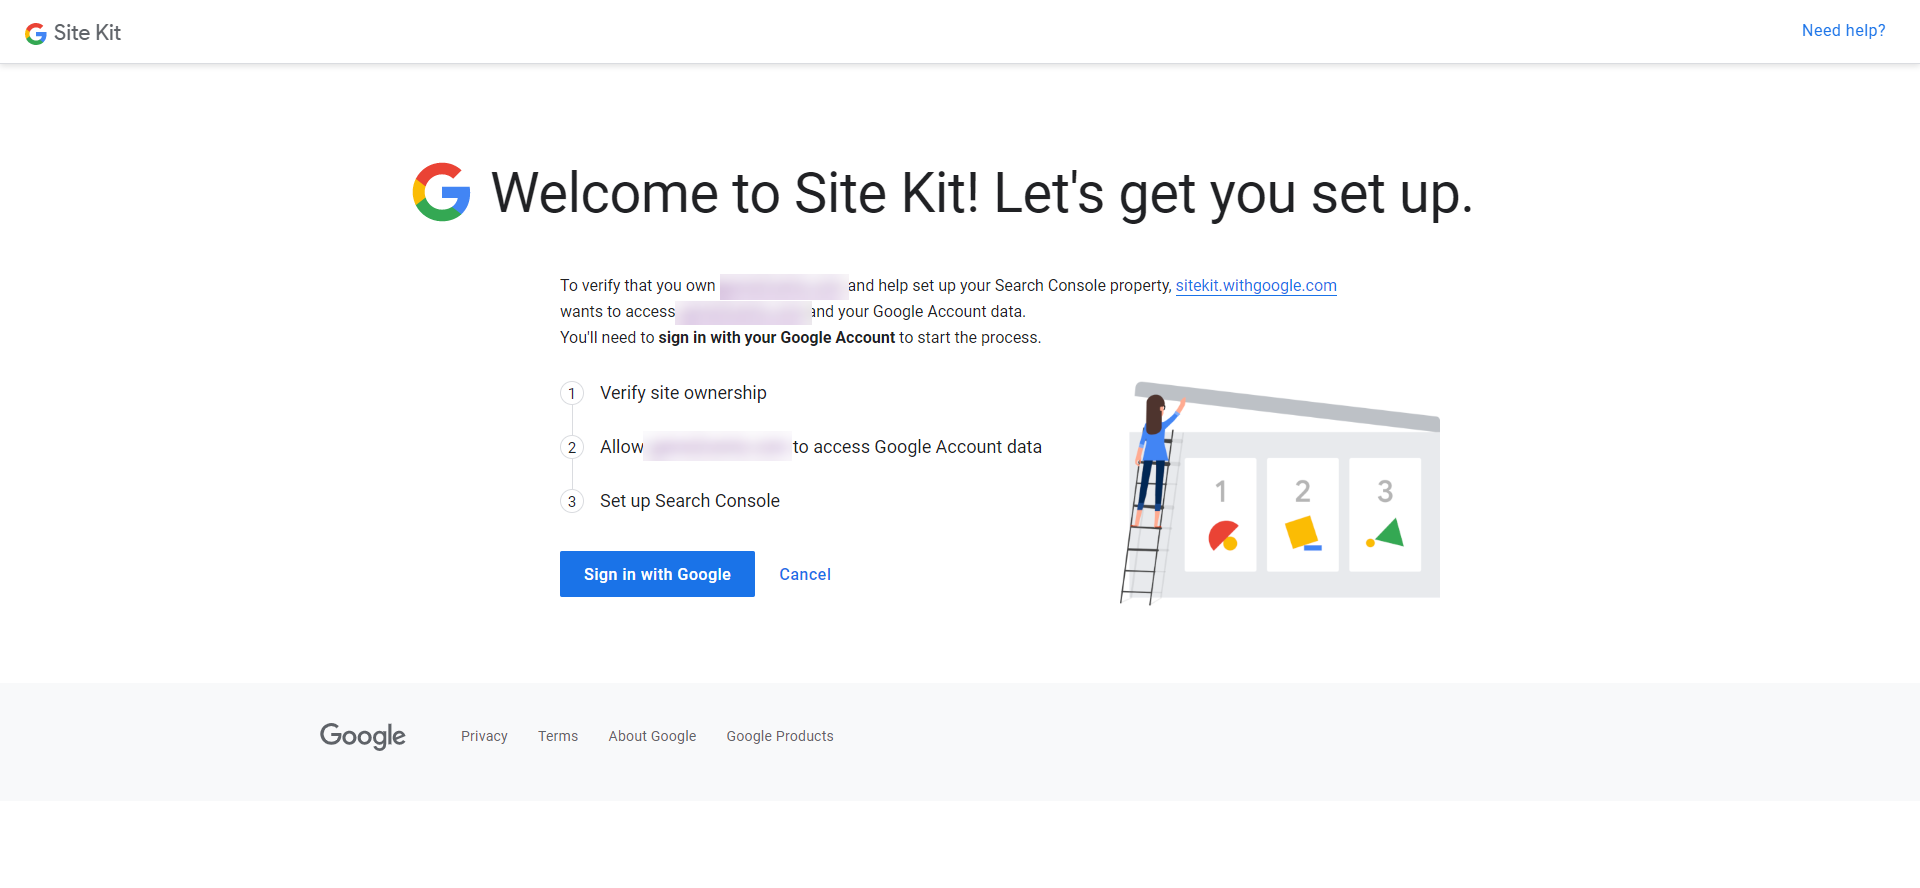
STEP 6: Click the START SETUP button on this page.
After the above step, you will be redirected to a new page where it will outline the next steps for you. These steps are:
- Verify site ownership
- Allow [yourwebsite.com] to access Google Account Data
- Set up Search Console
STEP 7: You’ll need to sign in to Google to continue, so click Sign In With Google,
then sign in with your desired Google Account. The Google Account you choose would be given authorized access to your website data.
STEP 8: Click Allow to give Site Kit permissions to access and manage the Search Console
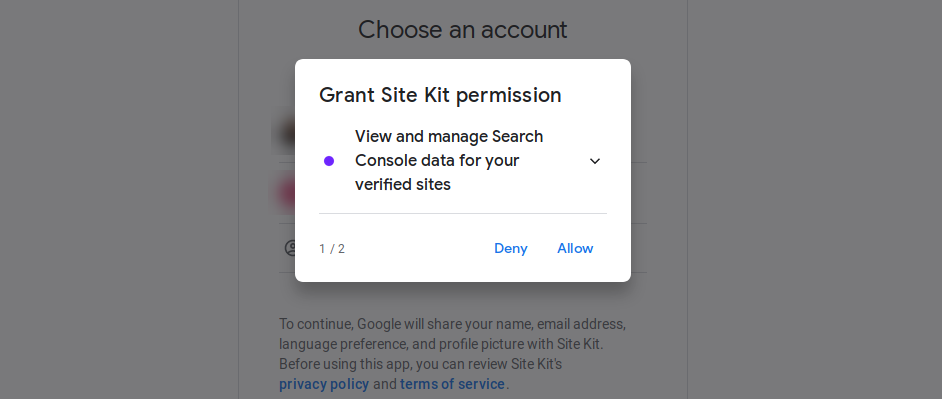
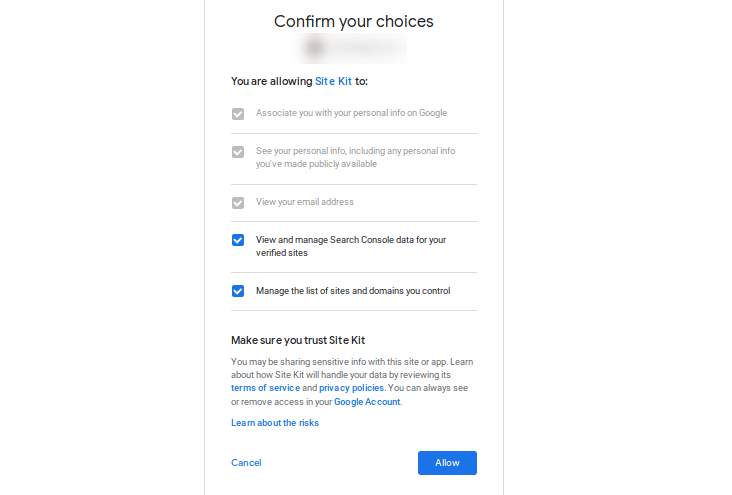
Review the permissions you are granting Site Kit, then confirm by clicking Allow
STEP 9: On the next page, under Verify site ownership, click Proceed
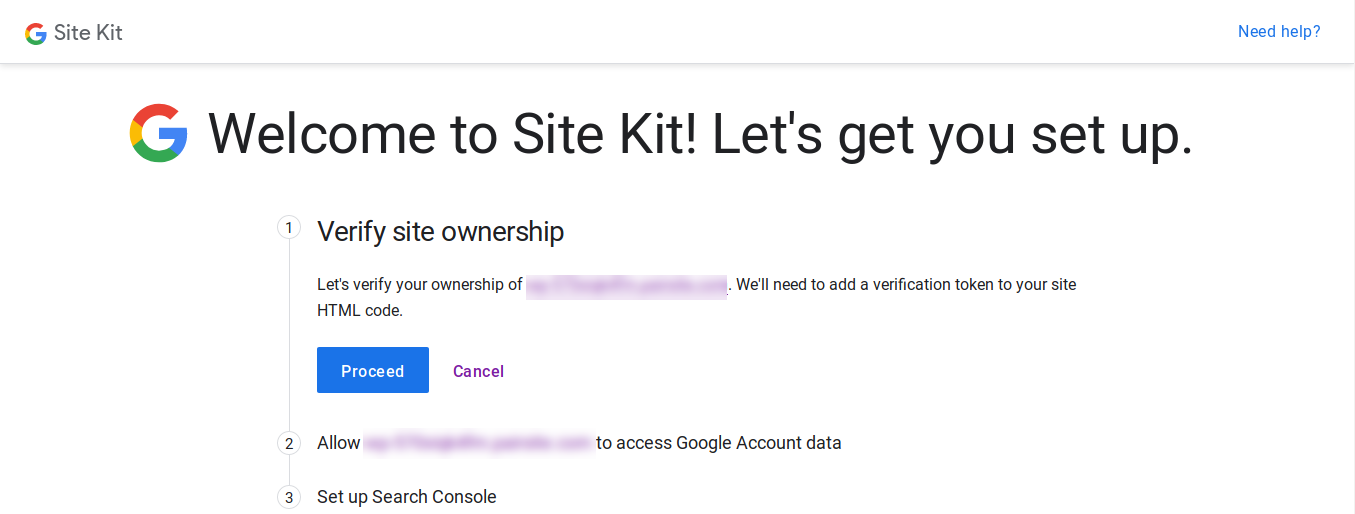
Next, under Allow [yourwebsite.com] to access Google Account data, click the Allow button
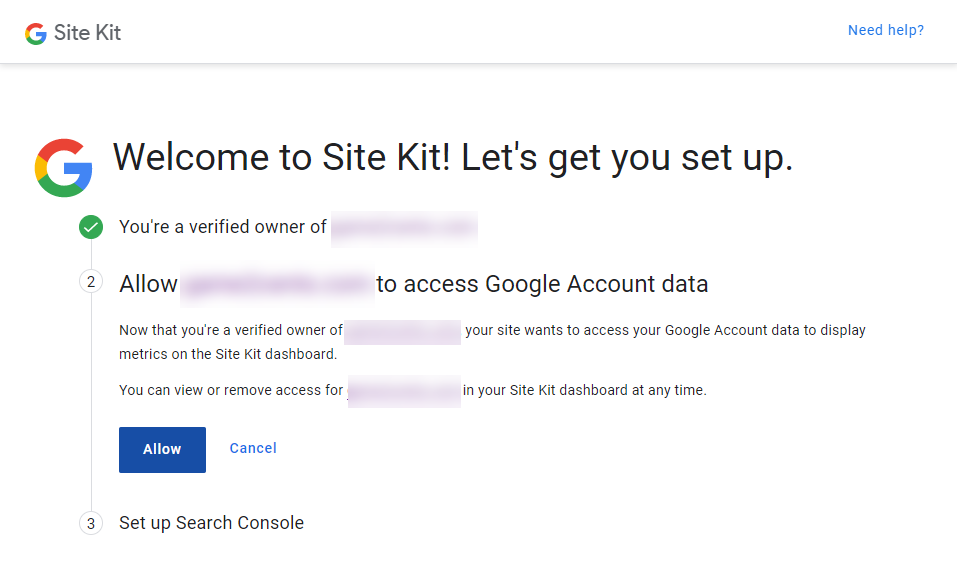
Next, under Set up Search Console, click Add Site. You are almost done!
STEP 10: Click Go to my Dashboard to return to your WordPress admin interface
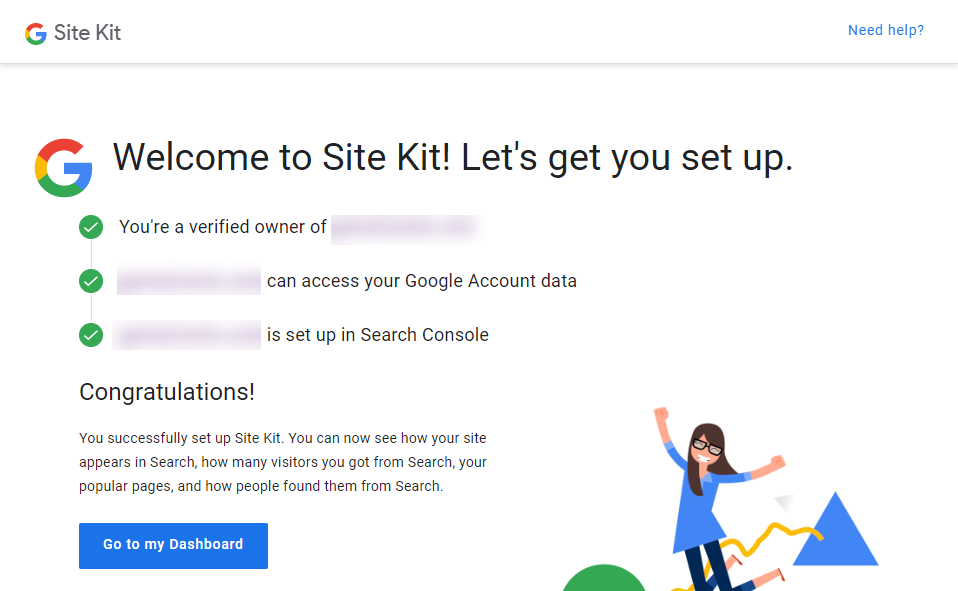
Congrats! Your website is now set up and connected to Google Search Console. This also means that your website is ready to be connected to other Google Products such as Google Analytics, Google Adsense and Google Page Speed Insights e.t.c.
Part 3: Connecting Your Website To Google Analytics
Connecting your WordPress site to Google Analytics is the last part. Just continue with the steps below:
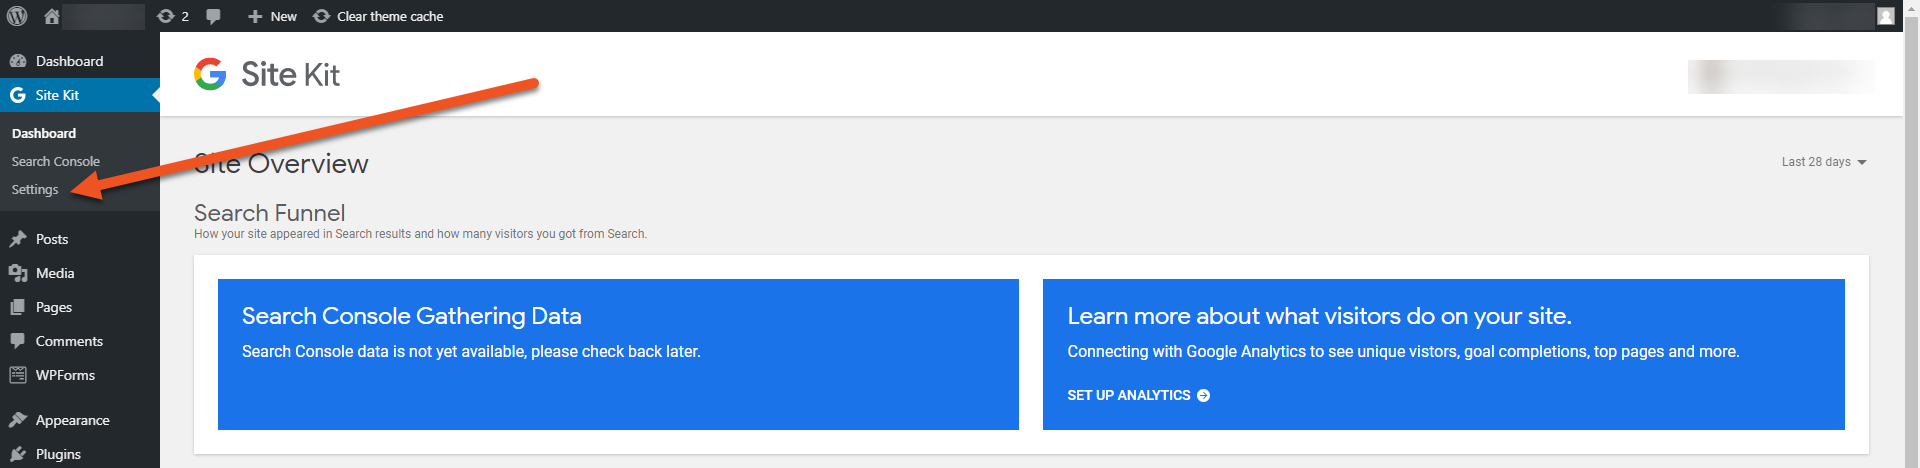
STEP 11: In your WordPress admin interface, go to the left sidebar and click the Site Kit tab. In the drop-down under the Site Kit tab, you will notice another menu called Settings, click it.
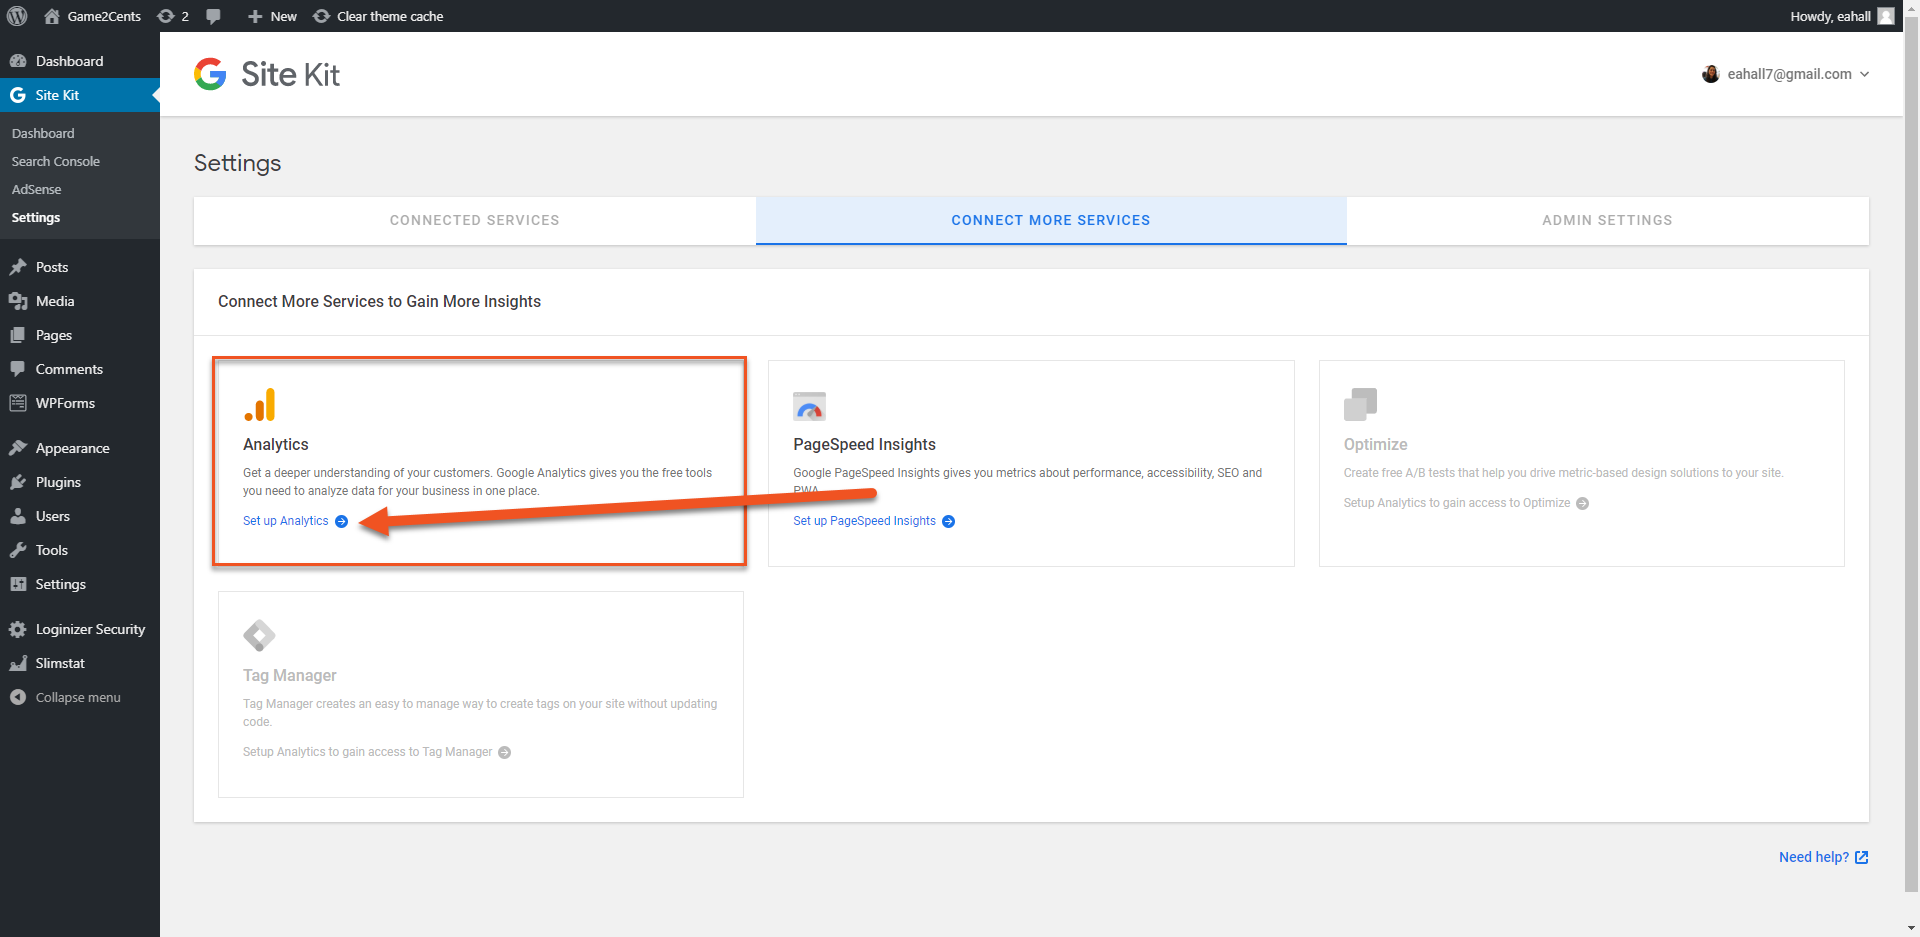
STEP 12: In the Settings interface, make sure Connect more Services is selected.

STEP 13: Under the Analytics section, click on the blue Set Up Analytics link.
STEP 14: Again, Choose the Google account you want to use. I recommended that you choose the same Google Account you chose earlier during the Site Kit set up phase.
You may be prompted to grant the account permission. If so, click Allow.
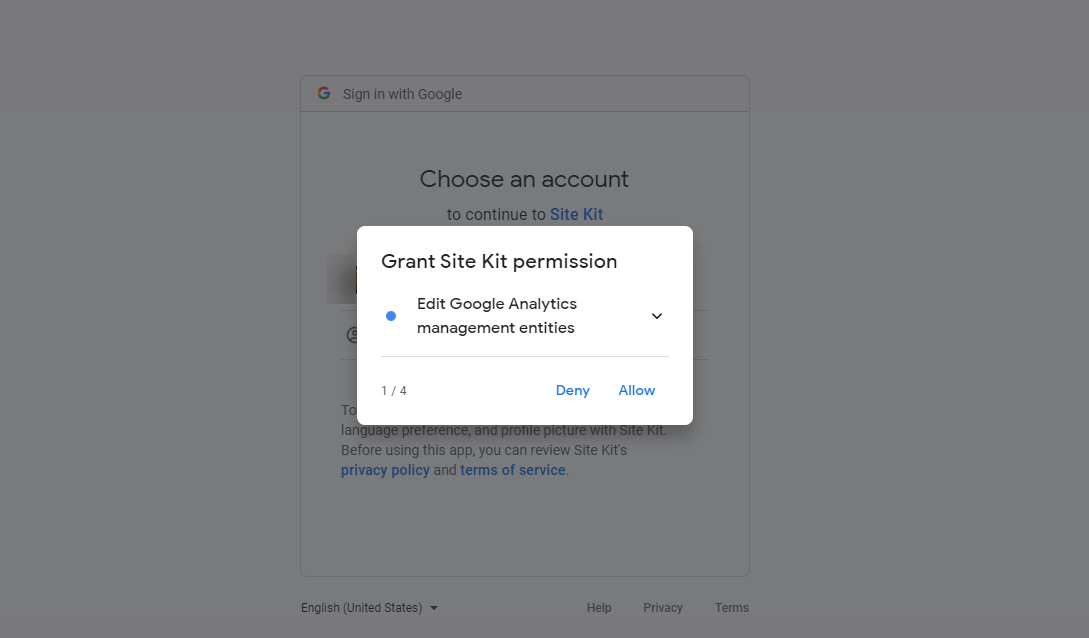
STEP 15: The next page will show you an overview of the permissions. Make sure everything is ticked and click Allow
STEP 16: When permissions have been granted, you will be returned to the Google Site Kit interface and asked to put in the following information:
STEP 17:
Account: select the Google account you want connected to the Google Site Kit
Property: this is an element specific to Google Analytics. Properties are used to identify what tracking code should be used, as well as other things.
💡TIP: If you don't already have a Google Analytics property, then you would find out that the drop down is empty.

Since you do not have a property created for your website yet, you must create a new one by clicking the Property drop-down and selecting Setup a New Property. Follow this guide to create a Universal Analytics Property (Recommended), then come back here for the rest of the guide.
View: this will allow you to select what kind of website data you want displayed in the WordPress Google Site Kit interface. Don’t worry much, in the View dropdown next to Property, just select the view that shows after selecting the property you just created.
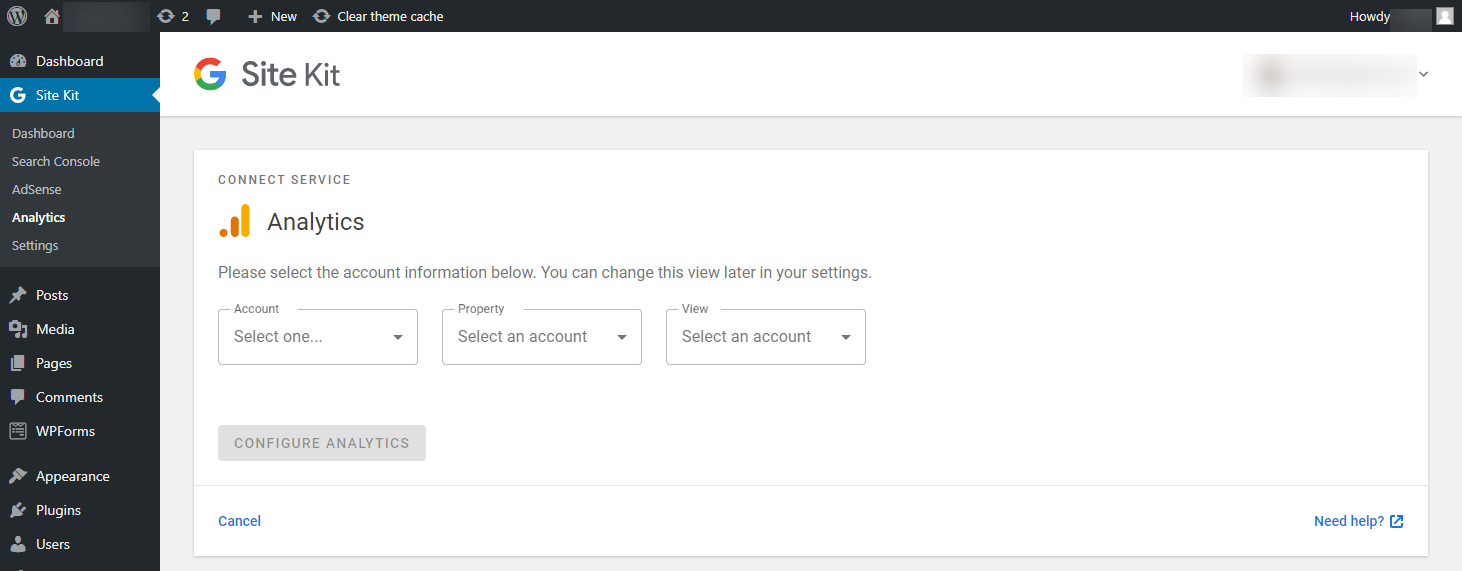
STEP 18: Once you have successfully filled in the information in the last step above, click the Configure Analytics button. This will connect the Google Analytics account to your WordPress site.
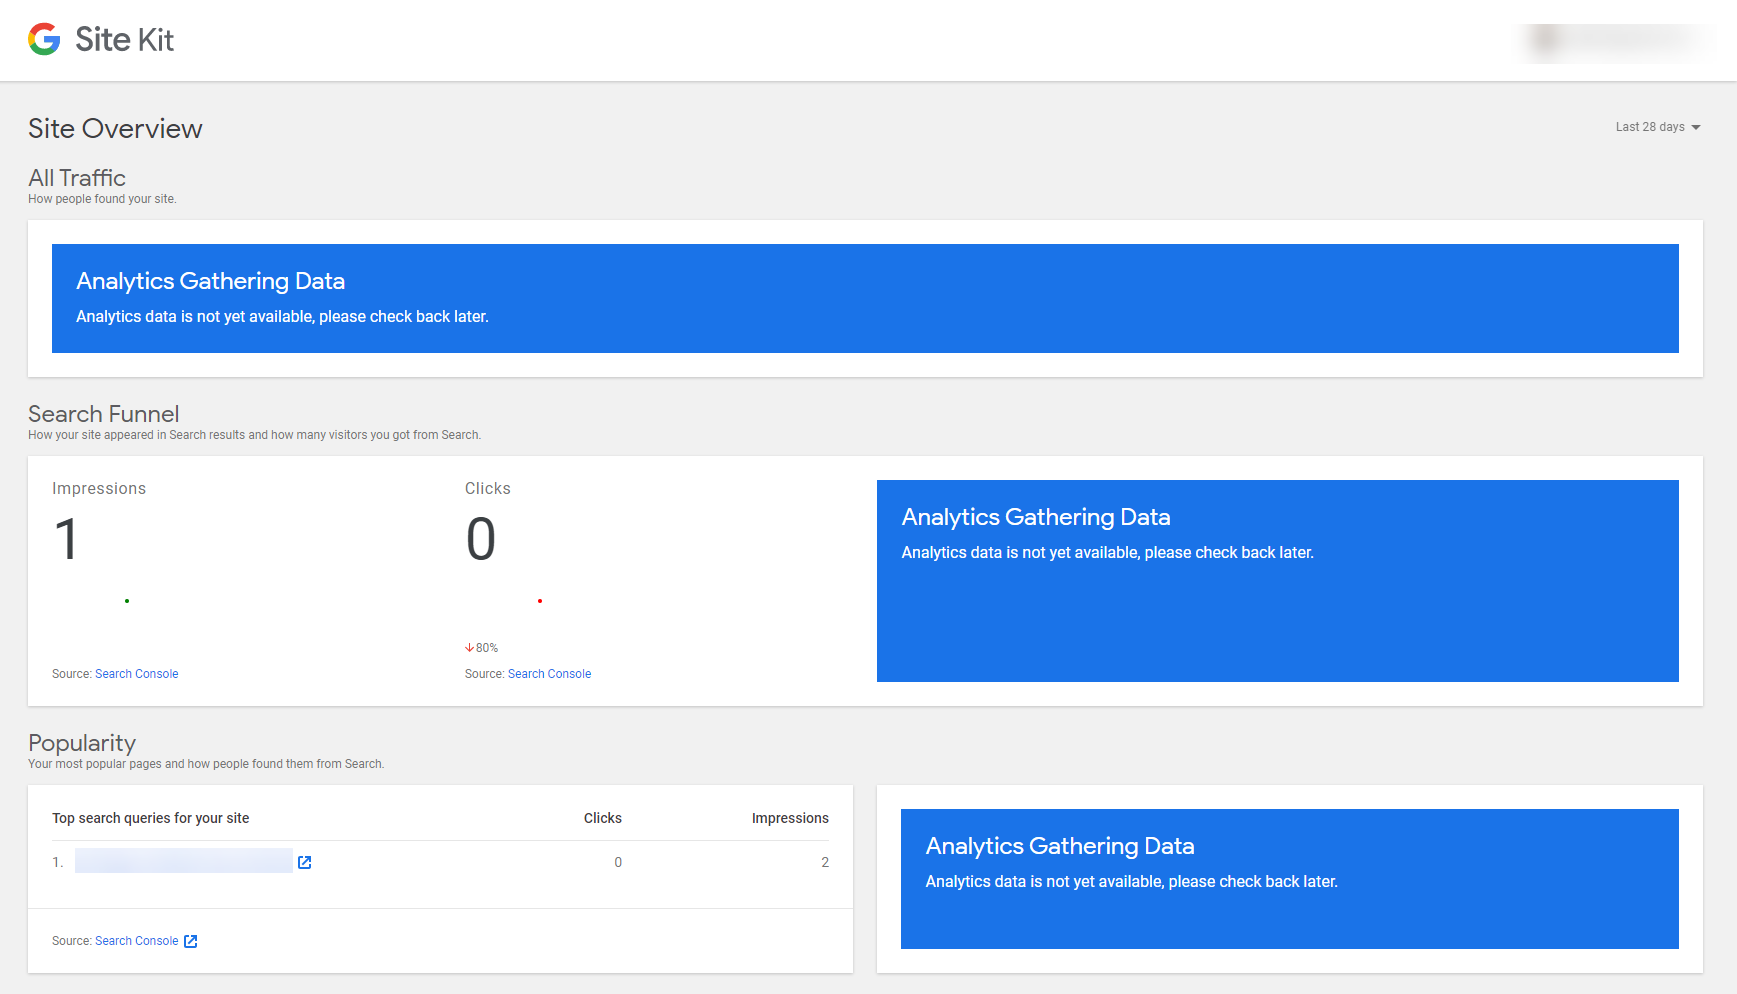
STEP 19: Once configured and the analytics are available, you can check them right from your WordPress admin interface. To do this, go to the Site Kit tab on the left pane as usual, then click Analytics in the drop-down. This will open the Analytics page.
DONE!! 🥂
💡TIP: It may take a while before Analytics starts displaying stats about your website, so give it a few hours and come back to check.
You can also monitor your website’s usage by also installing the Google Analytics app on your smartphone and logging in the Google Account you used to configure Analytics for your website earlier. The Analytics app is available on both the Apple App Store (iOS) and Google PlayStore (Android);


